Last Updated on: 26th June 2020
When it comes to Instagram, a cohesive feed is all that we crave for! Yes ultimately we all are aiming for photos that make our feed look aesthetically pleasing and alluring. But don’t forget along the line, that what makes your feed attractive is the content; quality and consistency of your photos.

It doesn’t mean that every photo has to match perfectly, but it helps people identify your photos with your style, editing and vibe. If you have one photo with colors that pop and another with a more muted edit, trust me its going to throw off your audience.
So after years of experimenting, doing it all wrong, then learning from multiple sources and correcting, I have now finally come to sharing with you guys how you can edit your photos just like me!


And as a bonus, I’m giving away a Lightroom preset for FREE , but for a limited time! All you need to do is just sign up below to get my NEW FREE PRESET emailed to you today!
Here is a stepwise complete guide to help you find your style and figure out some quick tips to edit your photos. Let’s jump right in!!
Step 1: Take Amazing photos.
Well, this does not mean you have to have an expensive camera. When you are scrolling through Instagram, you will stumble upon so many beautiful pictures that will leave you wishing you’ve had the same talent as them….They must have a fancy camera right? Wrong… or At least not necessarily true. Most photographers are self taught(like I am!) and usually start with their smartphones and gradually work their way to a DSLR or mirror less camera.
I started with my IPhone and the most basic Canon EOS DSLR camera and invested on different lenses and equipments as I kept improving and now finally switched to Sony Mirror less A7RIII camera which let me tell you, I am pretty impressed with the picture quality and the vast setting options in the camera to shoot any kind of photo. But you can take equally stunning photos with just your smartphone and edit them beautifully to have an amazing feed.


Tip: If you are shooting with a Camera, don’t forget to take photos in RAW format. RAW produces higher quality images and gives you more power in selecting the color space and editing without losing details. So if your camera is not set to take photos in RAW format, now would be the time you’d make that change.
Step 2: Edit your Photos using Lightroom
Let’s dive right into editing. The first app that you need to install is Adobe Lightroom. It is undoubtedly every photographers best friend.
You can download it here! Choose the subscription plan that works best for you based on your devices and let’s get started.
When it comes to editing in Lightroom, it can be a bit overwhelming. Trust me I’ve had my fair share of struggles with the app. While presets can help speed the process up, each photo will usually need some tweaks whether you use presets or not. From exposure to coloring, here are some of the tools and tips I use to edit my photos in Lightroom for Instagram.
Create an album and import the photo that you want to edit.
Settings 1: Lighting is Everything
Try to use natural light as much as possible when shooting the photo. If you are indoors try to face a window with a good source of light or add in a secondary source of light if needed.
Also, try to underexpose your images just a little bit. You don’t want it to be too dark, but make sure the brightest part of the image isn’t washed out. You can’t recover the data if a part of the image is blown out or completely blacked out, so you want to keep an eye on both ends of the spectrum. Personally I find shooting slightly darker makes it easier to edit it later and brighten it up while saving the colors and brighter parts of the photo.


In the Lightroom app go to the light settings. This will show you the Exposure, Contrast, Highlights and Shadow settings which together enhances the lighting in your photo.
Exposure: If your photo has too much light (over exposed) move the slider to the left to reduce the exposure. If it is darker (under exposed) bring up the slider to the right to add more light in your photo. As mentioned before, I typically shoot my photos a little underexposed so that I have some window to bring out the shadows, so I increase the light by +0.2 ~ +0.6
Contrast: The contrast setting determines the contrast between light and dark colors. Moving the slider to the left in my opinion makes it look a little natural, If you move it to the right, it makes your photos look more dramatic. I typically bring down the contrast a little.
Highlights: This controls the brightness of the lighter parts of your image. To get more details, I suggest moving the slider to the left. I usually bring down the highlights a lot (< -55), because I like most of my image details to be visible.
Shadows: This slider controls the brightness of the lighter parts of your photo. Moving the slider to the left deepens the shadows; moving it to the right brightens them up and recovers details. I bring up the shadow to > +50 to bring out more details.
Whites: Sets the white points of an image. I raise it a little to make the photo look bright and airy
Blacks: Sets the black points of an image. Move down the slider to give your hair and eyes some darker tones.


By just changing the lighting in the photo, almost 50% of the work is done and your photo looks nicely enhanced. If you are interested in more fine tuning, you can use the tone curve to adjust the tone and contrast in your photo.
Settings 2: Make Color adjustments
Colors play a vital part in your image. This section can be tweaked to enhance different colors in your photo and also the temperature and saturation. The colors for each photo vary on individual choice and the image composition. I like my colors to look as close to the real life thing as possible, So I will go over how to make those changes:
First, I adjust the warmth; I love warm photos. This means I turn the temperature slider a bit more to the yellow tones vs the blues. I don’t go too overboard with warmth though because I never want anything to look too orange.
Next I bring up the tint to the pink side to add more rosy tones to my photos.
Now if the aesthetic you are aiming at is more of lively and natural (like me) the next setting, you should do is bring down the saturation a little and bump up the vibrance a tad. Again, I don’t do this in every scenario, but sometimes it’s necessary to make the photo pop!


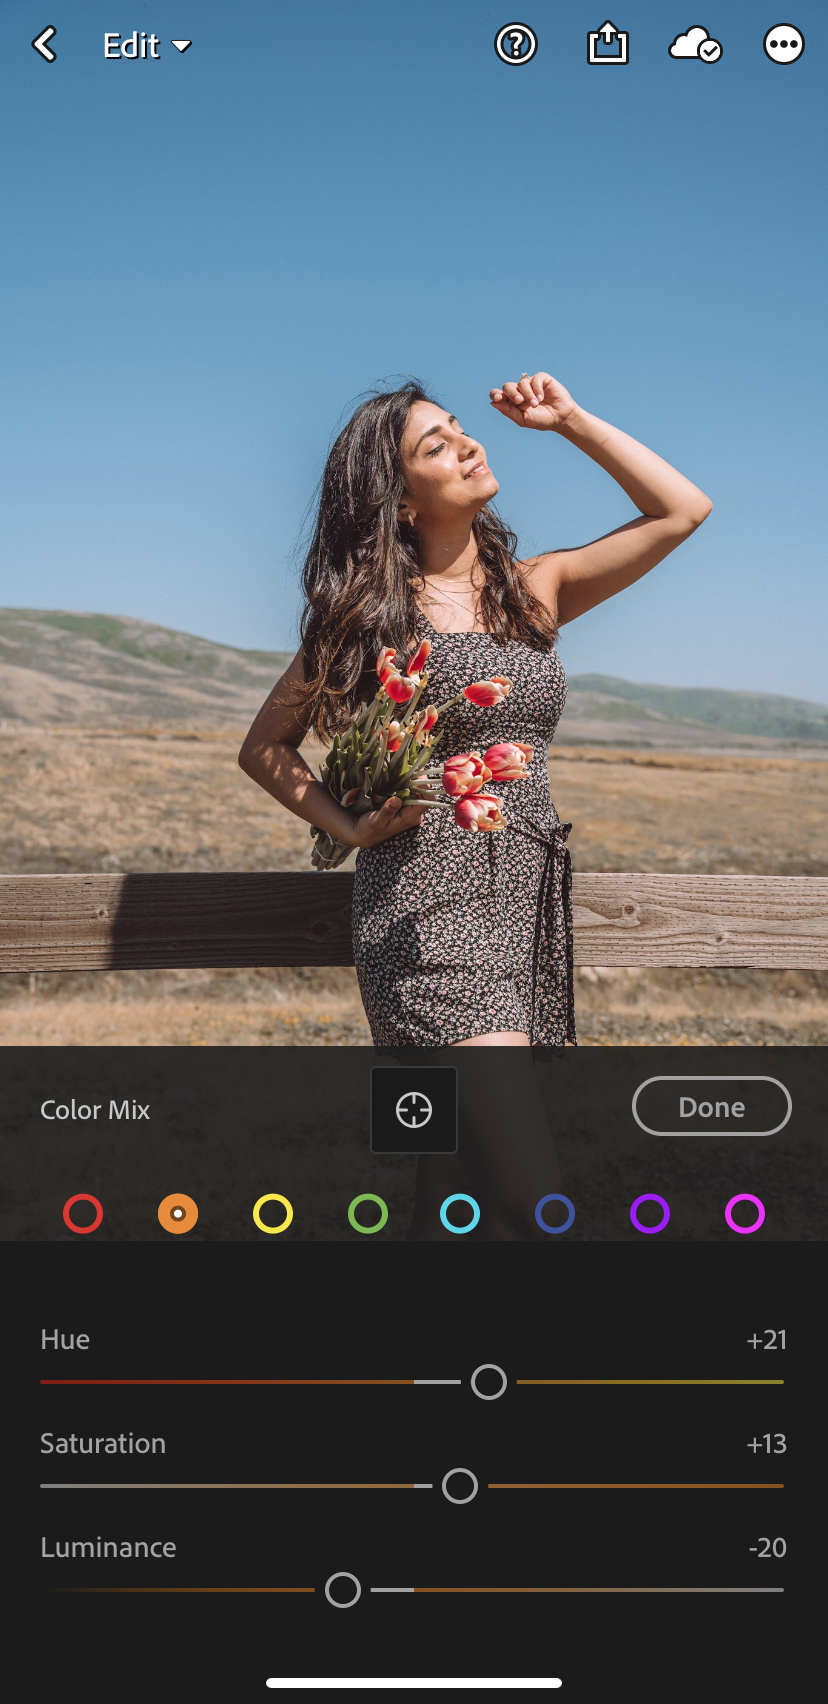
You can make changes to each color in the Mix option which is one of my favorite parts of the editing. I really like warmer skin tone and less of the greens in my photos and this is where you can make all those changes.
Each color has 3 settings:
Hue: This is an adjustment for the color shade.
Saturation: This refers to the strength of a color.
Luminance: This is for the brightness of a color.
For my skin, I typically shift the orange hue slightly to the yellow side. I also tend to decrease the luminance just a little bit and increase the saturation to get the right level of tan for the lighting in the photo. I set the hue of the yellow towards the orange side and bring down the saturation and up the luminance a bit.


For the green, I completely bring down the saturation and adjust the hue to the darker green side.


For brighter skies, I adjust the hue of the blue to a lighter shade and bring up the saturation and turn down the luminance a little bit.


When you make adjustments to a photo or to a preset, this is the part where creating a cohesive feed comes in. You don’t want to have really bright colors in one photo and really muted colors in the next. How you edit colors is an easy way to create a cohesive look.


If you are interested in learning more about the HSL adjustments. Here is a great resource going over each of the settings.
Settings 3: Adding some effects
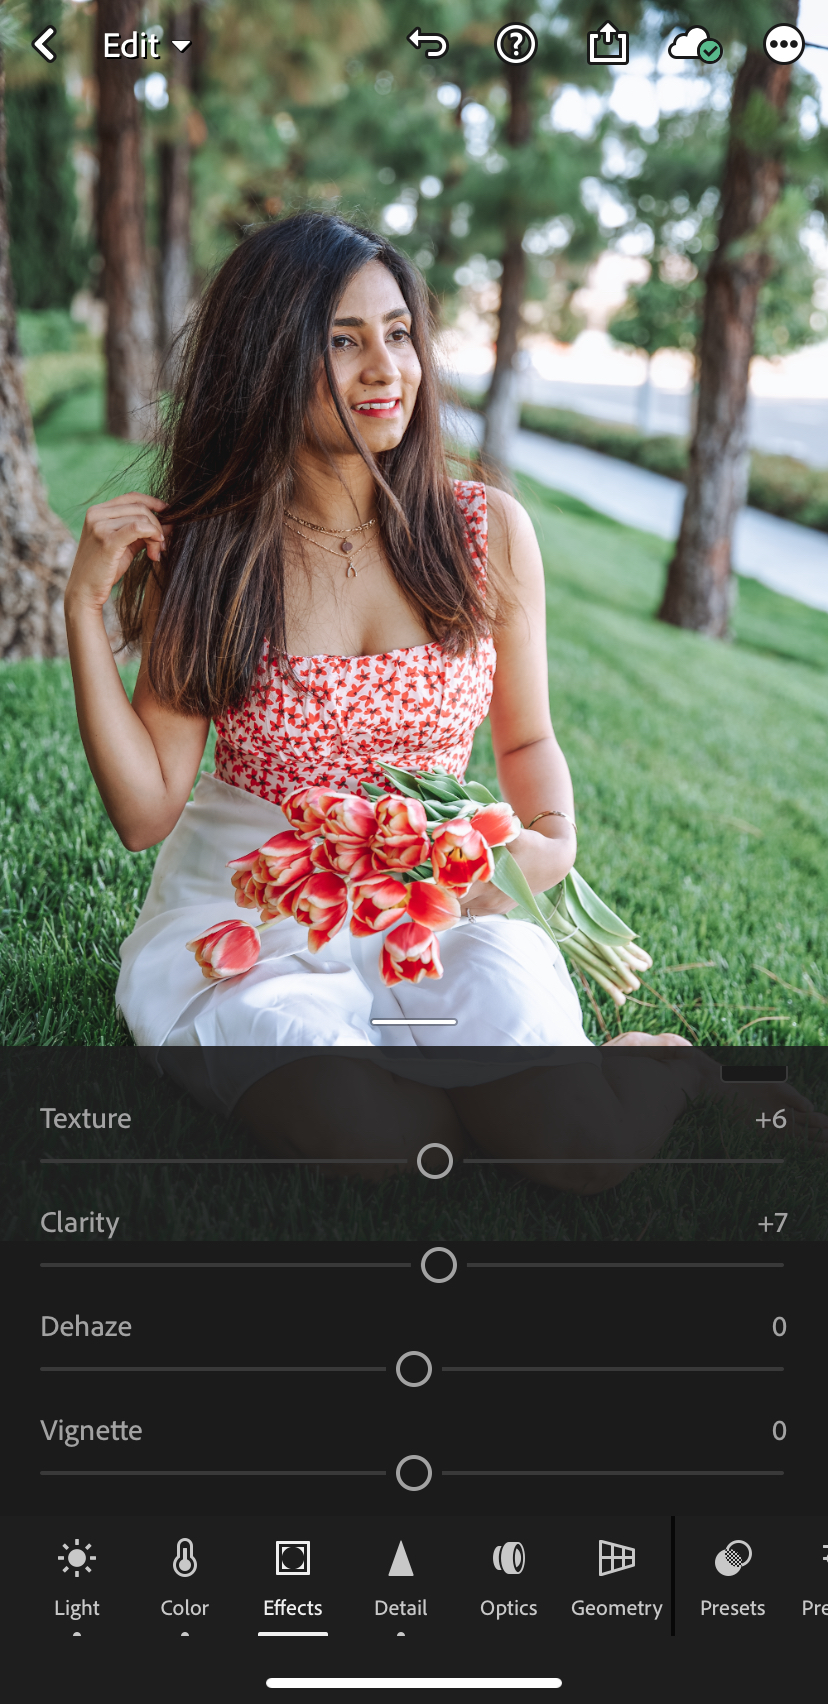
I don’t do a lot of changes in this section but just small minor tweaks to add some grains and increase the sharpness of the image.
I use the Texture slider to accentuate some details in the photos. Next I turn up the Clarity tiny bit; this increases the contrast around the edges of objects in the photo which makes them look more crisp.

Settings 4: Reduce noise and apply sharpening
Finally I use the slider controls provided under the Detail panel, to sharpen and bring out the details in my photos.
I also use the noise and color noise reduction by turning them up a little to remove any image noise that is degrading the quality.
Settings 5: Export and Apply adjustments to other photos
Select the Export option and then Share to.. ->Save image and this will save the beautifully edited photo to your device.
Good news!!! If you want to edit other photos with the same effect, you don’t have to do this all over again. Just select the three dots on the top right hand side ( on mobile device) and select Copy settings and then choose the photo that you want to edit and just do Paste Settings and you are done!!!
So there you have it, Your photo is feed ready and waiting to be posted!!!


Note, each photo is so different and requires unique variations of tweaks. Although I use the same ‘process’ on each photo, the steps vary because of all the different elements within the photos, like light or color or whether it’s indoor or outdoor. Light is the key to good photography! Bad light = need more editing work. Hence we’re always trying to get the best light.
Step 3: Clean and Enhance your Photos
For some other final tweaks like removing objects and disturbances, changing the sky and adding effects, here are some other Apps that I use:
Clean your Image with Touch Retouch App
Small details like a hole in the wall, a blurry bird that looks odd or people in the background, etc. can be distracting to the eye and make your photo less clean. Don’t worry you can fix them using any of these apps: Photoshop, Retouch or Snapseed. One of my favorite apps to remove objects and people is called Touch Retouch. This app is super powerful — use the object removal or quick repair brushes for easy edits. I use the clone tool to manually clone the surrounding areas into what you want to remove. This app is super quick and a lot easier to use than learning Photoshop!


Enhance your image with Snapseed
This is another easy editing app that has many features to use at your fingertips.
To clear the background disturbances: I use the Healing options under Tools for super quick object removal.
To enhance the background: Select the Tune Image option under Tools and then select the ambiance option. Bring up the ambiance slider to make the background brighter and appealing.


Change the sky with Enlight Quickshot App
Not a favorable weather for a photo? No problem! You can easily swap out that overcast sky with a beautiful sunny sky or sunset using the app Quickshot (only available for iOS). This app uses machine learning to understand what part of the photo is the sky and you can easily change it with just one click!
From overcast to sunny…


From boring blue to interesting clouds…


Quick Filters with VSCO
Another great app which helps you to edit your photos quickly with a wide options of preset filters and editing tools. These presets get you started with most of the settings and you just need to fine tune the light and saturation which just makes editing a 5 minute game!


Another App that I use extensively is Adobe Photoshop. The Post processing capabilities of Photoshop is literally unlimited and I am still in the learning journey. But some of the quick edits that I do are changing the background of the image, improve skin tone and object removal. I will cover some of my quick Photoshop edits in a separate Blog Post!
Step 4: Claim your Free Preset to get started!
Now the easier way to get started is to buy presets packs from photographers on Instagram. These presets help you with most of the editing and then you can fine tune the colors and lighting based on your photos. Great News!!!! I have created a preset just for you to edit your photo with just one click and guess what, its FREEEEE!!!!
Just hit subscribe on my instagram or my blog and you will receive your FREE preset!!!
Now it’s time for you to start playing with your photos. Don’t be afraid to start from scratch and find your editing style as you go or use a preset and fine tune some adjustments from there. One preset will not work perfectly for every photo, so make some adjustments to bring out the colors and the look that you love.
Don’t forget to use #EDITWITHPREK and to tag @preksharaj so I can see the magic you create and share your edits!
XO,
Preksha
Like it? Pin it for Later!


 5 Best Cenotes Near Tulum
 A Weekend in Seattle: 3 Day Itinerary
 Unique things to do in Northern California: Mendocino & Sonoma County


Leave a Reply